Tag: dry skin

  • The Science of Skin Barrier Repair: Why CeraVe Moisturizing Cream is a Dermatologist Cult Favorite

    The Science of Skin Barrier Repair: Why CeraVe Moisturizing Cream is a Dermatologist Cult Favorite

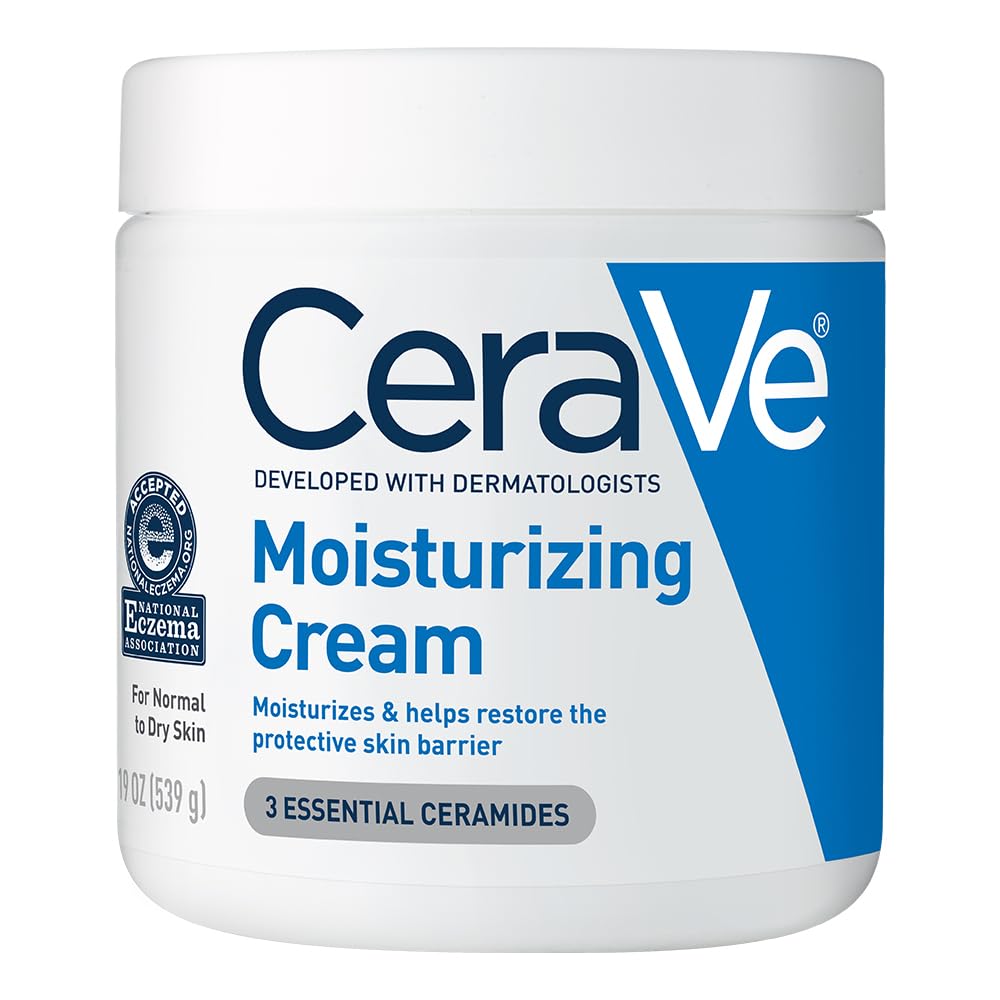
    When it comes to treating dry, compromised, or sensitive skin, the beauty industry loves to launch shiny new trends. Yet, year after year, one humble tub remains a permanent fixture on dermatologist recommendations and vanity tables alike: **CeraVe Moisturizing Cream**. Affectionately known as “CeraVe in the tub,” this product has achieved cult status not through flashy marketing, but through a clinically backed, formulation-first approach to skin barrier health.

    If you want to understand exactly why this cream works so effectively, it helps to look past the label and dive into the biological mechanisms of how it interacts with your [skin cells]. To achieve a truly [refined complexion], you need a formula that acts as the literal architecture of your skin. This guide breaks down the science of the CeraVe “Ceramide Triad” and explains why it is the essential mortar for a resilient [healthy skin barrier].

    1. The Blueprint of the Skin Barrier: The Brick and Mortar Analogy

    To appreciate why CeraVe is a “Gold Standard,” we must first look at the structure of the **stratum corneum**—the outermost layer of the skin. Dermatologists use the **”Brick and Mortar” model** to describe this protective shield, which is the foundation of total [skin health].

    The Bricks: These are your corneocytes (dead skin cells packed with keratin) that provide the physical structure.

    The Mortar: This is a dense, organized matrix of intercellular lipids that glues those cells together.

    The Critical Function: When the mortar is intact, it prevents Transepidermal Water Loss (TEWL) and blocks environmental irritants from causing chronic redness.

    2. The Formulation Breakdown: The Power of the Ceramide Triad

    Most basic moisturizers include a single type of lipid for surface softness. CeraVe’s clinical reputation is built on the fact that they provide a complete structural repair kit. By delivering a patented ratio of three specific, bio-identical Ceramides, the cream replaces the exact molecules your barrier loses due to age, weather, or aggressive [active ingredients].

    Ceramide 1 (The molecular “Staple”): Its primary job is cross-linking the lipid layers together. It provides the physical strength needed to prevent the “cracks” that lead to stinging and sensitivity.

    Ceramide 3 (The “Hydration Lock”): This is the most critical lipid for stopping TEWL (moisture loss). It creates the waterproof seal that ensures the water in your skin stays trapped for 24 hours.

    Ceramide 6-II (The Texture Regulator): This unique ceramide helps normalize the way your skin sheds dead cells. It smooths out rough skin texture while the other lipids repair the foundation.

    The Synergy: When used together, this triad mimics the natural “mortar” of your barrier, allowing the skin to enter a state of deep skin regeneration. *See the full science:* Ceramides: The Ultimate Guide to Barrier Repair.

    3. Beyond Ceramides: The Role of Hyaluronic Acid and Glycerin

    Lipids (oils) provide the seal, but your skin still needs a “Drink” of water to stay plump and reflective. CeraVe pairs its ceramide triad with the two most effective humectants in dermatology. This creates a “Double-Layer” hydration effect that targets both the surface and the deeper epidermis.

    Glycerin (The Deep Penetrator): Because it is a tiny molecule, Glycerin can travel through “Aquaporin” water channels to hydrate the skin from the inside out. It is the gold standard for stopping chronic winter dryness.

    Hyaluronic Acid (The Surface Plumper): This molecule acts like a sponge on the surface of your [healthy skin barrier]. It pulls moisture from the air to immediately fill in fine lines and achieve a dewy Glass Skin finish.

    The Result: By combining a deep-soaking humectant (Glycerin) with a surface-plumping humectant (HA), CeraVe ensures that every layer of your skin is saturated with moisture.

    4. The Delivery Mechanism: MVE Time-Release Technology

    A brilliant formulation means very little if the ingredients evaporate hours later. This is where CeraVe’s **MultiVesicular Emulsion (MVE) Technology** provides a clinical edge over traditional “rapid-release” lotions.

    The Sphere Structure: MVE technology utilizes microscopic, multi-layered spheres structured like tiny onions.

    The Time-Release Effect: As the cream sits on the skin, these concentric layers slowly peel away one by one.

    24-Hour Hydration: This mechanism ensures a controlled, slow-drip delivery of Ceramides and water, keeping your [healthy skin barrier] protected all day and night.

    5. Clinical Profile and the Aesthetic Experience

    Feature Attribute Skin Benefit
    Texture Rich, non-greasy Absorbs rapidly without a heavy film.
    Finish Matte-to-satin Ideal for use under makeup or SPF.
    Fragrance 100% Fragrance-free Safe for sensitive skin and Eczema.
    Comedogenicity Non-comedogenic Won’t clog pores; safe for acne-prone skin.

    6. The Protocol: How to Optimize Application for Maximum Results

    To get the absolute most out of your CeraVe Moisturizing Cream, the timing and order of your application are the secrets to achieving a [luminous glow]. Because this formula relies on humectants like Hyaluronic Acid to pull in water, applying it to bone-dry skin is a missed opportunity for deep repair. Follow this professional protocol to maximize your structural results.

    The Damp Skin Rule: Always apply your CeraVe immediately after washing your face or stepping out of the shower. Pat your skin lightly with a soft towel, leaving it visibly damp. This provides the humectants with an external water source to “trap” into your skin cells, leading to a much more hydrated finish.

    The Active Ingredient Buffer: If you are navigating the Retinization process, use CeraVe as your structural cushion. Apply a thin layer of cream before your [Retinol] or Tretinoin. This slows the penetration of the active, dramatically reducing the risk of skin irritation and peeling.

    The 100% Lipid Seal: For those with severely dry skin or for nightly recovery, follow your CeraVe application with 2 drops of Squalane Oil. While the cream provides the “Mortar” (Ceramides), the oil provides the “Lid,” creating an airtight safety seal that stops TEWL all night long.

    The Full Body Protocol: Do not neglect your neck, chest, and hands. Because CeraVe is available in large, high-value tubs, you should be generous with application to these areas, which often show signs of aging and barrier thinning faster than the face.

    7. Conclusion: The Foundation of Skin Resilience

    The CeraVe Moisturizing Cream is a masterpiece of accessible, clinical architecture. By delivering a time-released triad of essential Ceramides paired with deep-soaking humectants, it provides the precise structural support your [healthy skin barrier] needs to remain calm and resilient.
    Whether you are using it to buffer the side effects of Retinol or simply to achieve a smooth, [refined complexion], the “Blue Jar” is the definitive foundation of a high-performance routine. It proves that you don’t need a luxury price tag to achieve professional-grade results—you simply need a formula that respects the biology of your skin.
    Ready to Rebuild Your Skin’s Scaffolding?

    Shop the Gold Standard: Get the best price on the iconic CeraVe “Blue Jar” to start your barrier repair journey.
    👉 Check Price for CeraVe Moisturizing Cream on Amazon
    Master the Routine: Not sure how to layer CeraVe with your other serums? Use our interactive Regimen Architect.
    👉 Use The Personalized Routine Builder Now

  • DIY Face Toner: Refresh, Rebalance, and Radiate Naturally

    DIY Face Toner: Refresh, Rebalance, and Radiate Naturally

    Tired of scanning endless ingredient lists on store-bought toners? Looking for a natural, budget-friendly way to elevate your skincare routine? You’ve come to the right place! Creating your own DIY face toner is not only surprisingly simple but also allows you to tailor ingredients perfectly to your unique skin needs.


    Natural ingredients like apple cider vinegar, rose water, and green tea for making DIY face toner

    Forget harsh chemicals and artificial fragrances. Making natural face toner recipes puts you in control, ensuring you’re nourishing your skin with pure, beneficial ingredients. Whether you have oily, dry, sensitive, or combination skin, there’s a homemade toner waiting to be discovered.

    Let’s dive into the refreshing world of DIY toners and learn how to make face toner at home that leaves your skin balanced, bright, and happy.

    Why Bother with a Toner Anyway?

    Before we mix things up, let’s quickly recap why toners are a valuable step in any skincare routine:

    • Removes Last Traces: It wipes away residual cleanser, makeup, or impurities your cleansing step might have missed.
    • Balances Skin pH: Cleansers can disrupt your skin’s natural pH. Toners help restore this balance, making your skin less prone to issues.
    • Minimizes Pores: Many toners have astringent properties that can temporarily tighten skin and reduce the appearance of pores.
    • Adds Hydration: Some toners provide an initial layer of hydration, prepping the skin to better absorb serums and moisturizers.
    • Targets Specific Concerns: Depending on the ingredients, toners can soothe irritation, fight acne-causing bacteria, or deliver antioxidants.

    The Amazing Benefits of Going DIY with Your Toner

    Choosing to create a homemade toner offers several advantages over commercial options:

    • Ingredient Control: You know exactly what’s going onto your skin. No hidden alcohols, parabens, or synthetic fragrances.
    • Customization: Tailor recipes to your specific skin type (e.g., DIY hydrating face toner for dry skin, or best DIY toner for acne-prone skin).
    • Cost-Effective: Natural ingredients are often much cheaper in the long run compared to high-end toners.
    • Freshness: You can make small batches, ensuring your toner is always fresh and potent.
    • Eco-Friendly: Reduces packaging waste.
    • It’s Fun! Tapping into your inner skincare chemist is a rewarding experience.

    Ready to take control of your skincare ingredients? Making your own toner is the perfect place to start!

    Essential Ingredients for Your Homemade Toner Arsenal

    Building your DIY toner requires a base liquid and potentially some beneficial add-ins. Here are some popular and effective natural ingredients:


    Flat lay of apple cider vinegar, witch hazel, rose water, green tea, and aloe vera

    • Apple Cider Vinegar (ACV): (Always dilute!) Excellent for oily and acne-prone skin due to its natural alpha-hydroxy acids (AHAs) like malic acid and ability to balance pH. Use raw, unfiltered ACV with “the mother.” Long-tail focus: apple cider vinegar toner recipe, benefits of ACV toner.
    • Witch Hazel: A classic astringent, great for tightening pores and reducing inflammation. Opt for an alcohol-free homemade toner by choosing alcohol-free witch hazel, especially for sensitive or dry skin.
    • Rose Water: Gentle, hydrating, and soothing, with anti-inflammatory properties. Perfect for sensitive, dry, and mature skin. Long-tail focus: rose water toner DIY, benefits of rose water.
    • Green Tea: Packed with potent antioxidants called catechins (notably EGCG), green tea fights free radicals, soothes inflammation, and can help control oil production. Ideal for most skin types, especially oily and sensitive. Long-tail focus: green tea toner benefits.
    • Chamomile Tea: Extremely calming and anti-inflammatory, making it perfect for sensitive or irritated skin.
    • Aloe Vera Juice/Gel: Hydrating, soothing, and healing. Great for adding moisture and calming redness.
    • Vegetable Glycerin: A humectant, meaning it draws moisture to the skin. A few drops can boost hydration in any toner.
    • Essential Oils (Use Sparingly & With Caution):
      • Tea Tree Oil: Potent antibacterial, great for acne (use 1-2 drops per ounce, always dilute).
      • Lavender Oil: Calming, soothing, and has some antibacterial properties.
      • Chamomile Oil: Soothing and anti-inflammatory.

    Important Note: Always use distilled or filtered water when recipes call for water to avoid impurities and minerals found in tap water.

    Quick Guide: Choosing Your Toner Base

    Before diving into specific recipes, consider your main skin goal to choose the best primary liquid base for your needs:

    • 🎯 For Oil Control & Acne-Prone Skin: Diluted Apple Cider Vinegar (ACV) or Alcohol-Free Witch Hazel are excellent choices.
    • 💧 For Hydration & Soothing Dry/Sensitive Skin: Pure Rose Water, Aloe Vera Juice, or cooled Chamomile Tea work wonders.
    • 🌿 For Antioxidant Power & Balanced Skin: Brewed and cooled Green Tea is a fantastic all-around base.

    Many recipes blend these bases or add other beneficial ingredients, but this gives you a great starting point!

    Simple & Effective DIY Face Toner Recipes

    Ready to start mixing? Here are some easy recipes categorized by skin type. Remember to store your toners in clean, airtight glass bottles (preferably dark glass or stored away from light) and keep them refrigerated for longevity (usually 1-2 weeks).

    Watch how easy it is to make your own toner!


    1. Balancing Apple Cider Vinegar Toner (For Oily / Acne-Prone Skin)

    • Ingredients:
      • 1 part Raw Apple Cider Vinegar (with ‘the mother’)
      • 3-4 parts Distilled Water (adjust ratio based on sensitivity – start more diluted)
      • Optional: 2-3 drops Tea Tree Essential Oil
    • Instructions: Combine ingredients in a clean bottle. Shake well before each use.
    • Benefits: Helps balance pH, controls oil, exfoliates gently, fights acne bacteria. This is often considered the best DIY toner for acne-prone skin.

    2. Hydrating Rose Water & Glycerin Toner (For Dry / Mature Skin)

    • Ingredients:
      • 1/2 cup Pure Rose Water
      • 1 tsp Vegetable Glycerin
      • Optional: 1 tsp Aloe Vera Juice
    • Instructions: Combine ingredients in a clean bottle. Shake gently.
    • Benefits: Provides gentle hydration, soothes, leaves skin feeling soft and plump. A great DIY hydrating face toner.

    3. Soothing Chamomile & Aloe Toner (For Sensitive Skin)

    • Ingredients:
      • 1/2 cup Cooled Strong Chamomile Tea (steep 2 bags in 1/2 cup hot distilled water, let cool completely)
      • 2 tbsp Aloe Vera Juice or Gel
      • Optional: 1-2 drops Lavender Essential Oil
    • Instructions: Combine cooled tea and aloe (and essential oil, if using) in a clean bottle. Shake gently.
    • Benefits: Calms redness and irritation, provides gentle hydration. Excellent homemade toner for sensitive skin.

    4. Refreshing Green Tea & Witch Hazel Toner (For Combination / Normal Skin)

    • Ingredients:
      • 1/4 cup Cooled Strong Green Tea (steep 1-2 bags in 1/4 cup hot distilled water, cool completely)
      • 1/4 cup Alcohol-Free Witch Hazel
      • Optional: 1 tsp Aloe Vera Gel
    • Instructions: Combine all ingredients in a clean bottle. Shake well.
    • Benefits: Balances oil, provides antioxidants, gently tones and refreshes.


    Beautiful glass bottles filled with homemade DIY face toners

    Troubleshooting & Customizing Your DIY Toner

    One of the best things about DIY is the ability to adjust! If your first batch isn’t quite perfect, try these tips:

    • Toner Feels Too Drying or Strong? Reduce the amount of ACV or Witch Hazel in your next batch. Increase the proportion of distilled water, or add a teaspoon of Aloe Vera Juice or a few drops of Vegetable Glycerin for added moisture.
    • Need More Hydration? A few extra drops of Vegetable Glycerin (start with just 2-3 drops per 4oz) can make a big difference. You can also increase the amount of Aloe Vera Juice or use Rose Water as your primary base.
    • Seeking Extra Soothing Power? Ensure you’re using calming bases like brewed Chamomile Tea or pure Rose Water. Adding Aloe Vera is also excellent for soothing irritation.
    • Ready to Experiment Safely? Once you’re comfortable with a basic recipe, try blending different bases (like half Green Tea, half Rose Water). You can also explore other gentle floral waters (hydrosols) like Lavender Water or Cucumber Water as bases. Always patch test new combinations!

    How to Make and Use Your DIY Face Toner

    1. Gather Supplies: Choose your ingredients, grab measuring cups/spoons, and a clean glass spray bottle or dropper bottle.
    2. Sterilize: Ensure your bottle is thoroughly cleaned and preferably sterilized (boiling water or rubbing alcohol rinse, then air dry completely) to prevent bacterial growth.
    3. Mix Ingredients: Carefully measure and combine your chosen ingredients in the bottle.
    4. Label & Date: Clearly label the bottle with the ingredients and the date you made it.
    5. Store Properly: Keep your DIY face toner refrigerated. Most homemade toners without preservatives last 1-2 weeks. Discard if you notice any change in smell, color, or clarity.
    6. Patch Test: CRUCIAL STEP! Before applying to your entire face, test a small amount on your inner arm or jawline. Wait 24 hours to check for any irritation or reaction.
    7. Application: After cleansing, apply the toner. You can use a reusable cotton pad, gently sweeping it over your face and neck (avoiding the eye area). Alternatively, mist it lightly over your face if using a spray bottle, or pour a small amount into clean hands and pat onto the skin.
    8. Follow Up: Allow the toner to absorb for a minute before applying your serum, moisturizer, and sunscreen (in the AM). Use morning and night, or as needed.

    Important Considerations for DIY Skincare

    • Listen to Your Skin: If a toner causes stinging, burning, redness, or excessive dryness, stop using it or dilute it further for your next batch.
    • Ingredient Quality Matters: Use fresh, high-quality ingredients for the best results and safety. Organic where possible is a plus.
    • Shelf Life is Short: Embrace making small batches frequently. Natural ingredients spoil faster than commercial products loaded with preservatives. Refrigeration is key!
    • Essential Oil Safety: Always dilute essential oils properly (1-2 drops per ounce is a general guideline). Some can be irritating or cause photosensitivity. Research specific oils before use, especially if you have sensitive skin or are pregnant/nursing.
    • Go Greener: Make your DIY toner routine even more sustainable by using reusable cotton rounds instead of disposable ones. Patting the toner directly onto the skin with clean hands or using a mist application also minimizes waste.

    Final Thoughts: Embrace Your Natural Glow

    Creating your own DIY face toner is an empowering step towards a more natural, personalized, and effective skincare routine. By understanding your skin’s needs, choosing the right natural ingredients, and being willing to make small adjustments, you can craft beautiful homemade toner recipes that help you achieve that healthy, radiant glow you desire.

    Which DIY toner recipe are you excited to try first, or do you have a favorite customization? Let us know in the comments below! 👇

    Share this post with friends who love natural skincare!


    Frequently Asked Questions (FAQ)

    Q1: How long does DIY face toner last?
    A1: Since these recipes don’t contain strong preservatives, homemade toners generally last about 1-2 weeks when stored properly in the refrigerator. Always discard if you see changes in smell, color, or cloudiness.

    Q2: Can I use tap water instead of distilled water in my homemade toner?
    A2: It’s highly recommended to use distilled, filtered, or previously boiled and cooled water. Tap water can contain minerals, chlorine, and potential microbes that could irritate the skin or cause the toner to spoil faster.

    Q3: Do I need to add preservatives to my DIY toner?
    A3: For short-term use (1-2 weeks) with refrigeration, preservatives aren’t strictly necessary. If you want a longer shelf life, you would need to research and incorporate cosmetic-grade preservatives, which adds complexity and is beyond the scope of simple DIY.

    Q4: Is DIY face toner as effective as store-bought toner?
    A4: Yes, it can be just as effective, and sometimes even better! DIY allows you to use potent, fresh ingredients tailored exactly to your skin’s needs, avoiding fillers or potential irritants found in some commercial products. The key is using the right ingredients for your skin type and using the toner consistently.

    Q5: Can I use witch hazel with alcohol in my DIY toner?
    A5: While you can, witch hazel containing alcohol can be very drying and irritating for many skin types, especially dry or sensitive skin. Opting for alcohol-free witch hazel is generally a safer and gentler choice for facial toners.

    Want More Natural Beauty Tips?

    Subscribe to our newsletter for the latest DIY recipes, skincare advice, and special offers!

    Subscribe Now!

    Or check out our popular post on Easy DIY Face Masks for Glowing Skin!

  • Unlock Radiant Skin: The Complete Guide to Face Serums (Benefits, How to Use & More)

    Unlock Radiant Skin: The Complete Guide to Face Serums (Benefits, How to Use & More)

    Are you looking for a powerful boost to your skincare routine? Do you want to target specific skin concerns like wrinkles, dark spots, dryness, or acne with concentrated effectiveness? If so, it’s time to discover the magic of face serums. These lightweight powerhouses are packed with active ingredients, designed to penetrate deeply and deliver transformative results for radiant, healthy skin.

    Often called the “workhorses” of a skincare routine, face serums can visibly improve skin texture, enhance hydration, boost firmness, and tackle a wide range of anti-aging benefits. But with so many types available, how do you choose the right one, and how do you use it for maximum impact?

    This guide will take a deep dive into face serums. We’ll explain exactly what they are, why they’re essential, explore the different types for every skin type and concern, and show you how to integrate them into your skincare routine for truly glowing skin. For a broader look at building your daily regimen, check our Complete Daily Skincare Guide.

    Table of Contents:

    <ul>
    <li><a href=”#what-are-face-serums”>1. What Exactly Are Face Serums? (Your Skincare Power Boosters)</a></li>
    <li><a href=”#why-use-a-serum”>2. Why Use a Face Serum? The Concentrated Benefits</a></li>
    <li><a href=”#key-ingredients-serums”>3. Key Ingredients Found in Effective Face Serums</a></li>
    <li><a href=”#types-of-face-serums”>4. Types of Face Serums: Targeted Solutions for Every Concern</a></li>
    <li><a href=”#choosing-right-serum”>5. Choosing the Right Face Serum for Your Skin Type & Goals</a></li>
    <li><a href=”#how-to-apply-serum”>6. How to Apply Face Serums for Maximum Absorption</a></li>
    <li><a href=”#integrating-serums”>7. Integrating Serums into Your Skincare Routine</a></li>
    <li><a href=”#serums-vs-others”>8. Serums vs. Other Skincare Products: What’s the Difference?</a></li>
    <li><a href=”#faqs-face-serums”>9. FAQs: Face Serums</a></li>
    <li><a href=”#conclusion-face-serums”>10. Conclusion: Elevate Your Routine with Face Serums</a></li>
    </ul>


    <h3 id=”what-are-face-serums”>1. What Exactly Are Face Serums? (Your Skincare Power Boosters)</h3>

    Face serums are lightweight skincare products. They usually come in liquid or gel form. Serums are designed to deliver a high concentration of active ingredients directly to your skin.

    • Concentrated Actives: They contain potent ingredients like vitamins, antioxidants, and acids in higher amounts than moisturizers.
    • Lightweight Texture: Serums are typically thin and absorb quickly, allowing them to penetrate deeper into the skin.
    • Targeted Treatment: Each serum is made to fix specific skin concerns, like fine lines, dark spots, or redness.

    Think of a face serum as a powerful, specialized treatment that gives your skincare routine an extra boost.

    <h3 id=”why-use-a-serum”>2. Why Use a Face Serum? The Concentrated Benefits</h3>

    Adding a face serum to your routine can bring many significant benefits for healthy, glowing skin:

    • Targeted Results: Serums deliver ingredients directly to the source of your skin concerns, leading to faster and more noticeable results.
    • Deep Penetration: Their light texture allows active ingredients to soak deeper into the skin, where they can work more effectively.
    • Boosted Efficacy: They can enhance the performance of your other skincare products, like moisturizers.
    • Versatility: There’s a face serum for almost every skin type and every concern, from hydration to anti-aging.
    • Lightweight Hydration: Many serums provide essential hydration without feeling heavy or greasy, making them great for oily skin or combination skin.

    <h3 id=”key-ingredients-serums”>3. Key Ingredients Found in Effective Face Serums</h3>

    The best face serums are packed with powerful ingredients. Here are some common ones and what they do:

    • Niacinamide (Vitamin B3): A multi-tasking hero. It strengthens the skin barrier, calms redness, reduces inflammation, minimizes pores, and evens skin tone.
    • Peptides: Tiny messengers that tell your skin to make more collagen and elastin. This leads to firmer skin and fewer wrinkles.
    • Hyaluronic Acid (HA): A powerful moisture magnet. It draws water into the skin, providing intense hydration and visibly plumping skin to reduce fine lines.
    • Retinoids (Retinol, Adapalene): The gold standard for anti-aging. They speed up skin cell turnover, reduce wrinkles, improve skin texture, and fade dark spots.
    • Vitamin C: A potent antioxidant. It brightens skin tone, reduces dark spots, protects from sun damage, and boosts collagen.
    • AHAs/BHAs (e.g., Glycolic Acid, Salicylic Acid): Chemical exfoliants that help clear pores, improve skin texture, and reduce breakouts and blackheads. See our BHA for Blackheads Guide.
    • Cica (Centella Asiatica): A K-Beauty favorite. It calms redness, soothes irritation, and helps skin healing.
    • Antioxidants (e.g., Green Tea Extract, Vitamin E): Protect skin from environmental damage and premature aging.

    <!– IMAGE: A clean infographic or graphic highlighting various key serum ingredients (Niacinamide, Peptides, HA, Retinoids, Vitamin C, Cica) with simple icons representing their benefits.
    Alt text: “Key ingredients in face serums: Niacinamide, Peptides, Hyaluronic Acid, Retinoids, Vitamin C, Cica” –>

    <h3 id=”types-of-face-serums”>4. Types of Face Serums: Targeted Solutions for Every Concern</h3>

    There’s a face serum for almost every skin concern:

    <!– IMAGE: A clean infographic or graphic categorizing serums by concern (e.g., Hydrating, Anti-Aging, Brightening, Acne, Calming) with corresponding ingredient icons.
    Alt text: “Types of face serums: hydrating, anti-aging, brightening, acne-fighting, calming” –>

    <h3 id=”choosing-right-serum”>5. Choosing the Right Face Serum for Your Skin Type & Goals</h3>

    Picking the best face serum for you depends on your unique skin type and what you want to achieve:

    <h3 id=”how-to-apply-serum”>6. How to Apply Face Serums for Maximum Absorption</h3>

    Applying face serums correctly is vital for them to work their magic:

    1. Cleanse & Tone: Start with thoroughly cleansed (and optionally toned) skin.
    2. Apply to Damp Skin (for some): For many serums (especially those with Hyaluronic Acid), apply to slightly damp skin. This helps pull moisture into the skin and aids absorption.
    3. Dispense Small Amount: A few drops (2-4) or a pea-sized amount is usually sufficient for your entire face and neck. Serums are concentrated!
    4. Gently Press/Pat: Apply the serum by gently pressing or patting it into your skin. Avoid harsh rubbing.
    5. Allow Absorption Time: Give your serum about 30-60 seconds to fully absorb before applying your next product. This prevents pilling.

    <!– VIDEO: Embed a short, easy-to-understand video demonstrating how to apply face serum, emphasizing damp skin, gentle patting, and proper order.
    Alt text: “Video tutorial: How to apply face serum for maximum absorption and radiant skin” –>

    <h3 id=”integrating-serums”>7. Integrating Serums into Your Skincare Routine</h3>

    Face serums are generally applied after cleansing/toning and before your moisturizer.

    • Order: Cleanser > Toner (optional) > Serum(s) > Eye Cream (optional) > Moisturizer > SPF (AM only). For a full guide, see our Skincare Layering Guide and Complete Olay Regenerist Skincare Routine Guide.
    • Morning Routine: Focus on antioxidants (Vitamin C), hydration (HA), and barrier support (Niacinamide).
    • Evening Routine: Ideal for actives like Retinoids (e.g., Olay Regenerist Retinol24 Serum), Peptides, and skin healing (Cica).
    • Avoid Conflicts: While many serums play well together, be cautious with strong actives like high-strength Vitamin C and Retinoids. Often best to use them at different times (AM vs. PM) or on alternate nights.

    <h3 id=”serums-vs-others”>8. Serums vs. Other Skincare Products: What’s the Difference?</h3>

    • Serums vs. Moisturizers:
      • Serums: Concentrated actives, lighter texture, targeted treatment, deeper penetration.
      • Moisturizers: Provide overall hydration, emollients, and occlusives to seal in moisture and protect the skin barrier. (See our Ultimate Guide to Face Moisturizers).
      • Verdict: You need both! Serums treat, moisturizers protect and hydrate.
    • Serums vs. Essences:
      • Essences: Typically lighter than serums, often used after toner to add a first layer of hydration and prep skin. Common in K-Beauty.
      • Verdict: Essences are a prep step; serums are a treatment step.
    • Serums vs. Toners:
      • Toners: Used after cleansing to balance pH, provide light hydration, and sometimes deliver mild actives.
      • Verdict: Toners prep, serums treat.

    <h3 id=”faqs-face-serums”>9. FAQs: Face Serums</h3>

    Q1: How much face serum should I use?
    A1: A few drops (2-4) or a pea-sized amount is generally enough for your face and neck. Serums are concentrated.

    Q2: Can I use more than one face serum at a time?
    A2: Yes, you can layer 2-3 serums, but stick to the “thinnest to thickest” rule. Be cautious with combining multiple strong actives. It’s often better to use different powerful serums at different times of the day (AM/PM).

    Q3: Do I still need a moisturizer if I use a hydrating serum?
    A3: Yes! Hydrating serums provide water, but moisturizers create a protective layer to prevent that water from evaporating and support your skin barrier.

    Q4: Can face serums clog pores?
    A4: Most well-formulated face serums are non-comedogenic (designed not to clog pores). However, if you have acne-prone skin, check ingredient lists and patch test new serums.

    Q5: How long does it take to see results from a face serum?
    A5: You might notice initial improvements in hydration or radiance within a few days. More significant changes for wrinkles, dark spots, or firmness typically take 4-8 weeks of consistent daily use, with full benefits emerging over several months.

    <h3 id=”conclusion-face-serums”>10. Conclusion: Elevate Your Routine with Face Serums</h3>

    Face serums are an indispensable tool in your quest for radiant, healthy skin. By understanding their concentrated power, choosing the right types for your skin concerns, and integrating them correctly into your skincare routine, you can effectively target everything from fine lines to dark spots and achieve truly transformative results.

    Embrace the power of face serums. Elevate your skincare routine and unlock the confidence that comes with beautifully glowing skin!


    Disclaimer: Always do a patch test before using new products. Consult a dermatologist if you have specific skin problems or severe acne. This content is for informational purposes only and does not constitute medical advice. This post may contain affiliate links, meaning we may earn a small commission if you buy through these links, at no extra cost to you.